
Independent B2B decision guide
How to Choose PU Rainwear Without Comparing the Wrong Garments
Published by EverBen
“PU rainwear” names only part of the product. It does not settle the textile support, lining, seam route, opening protection, fit, artwork, proof or packing. This guide helps a procurement team define those decisions before asking manufacturers to quote.
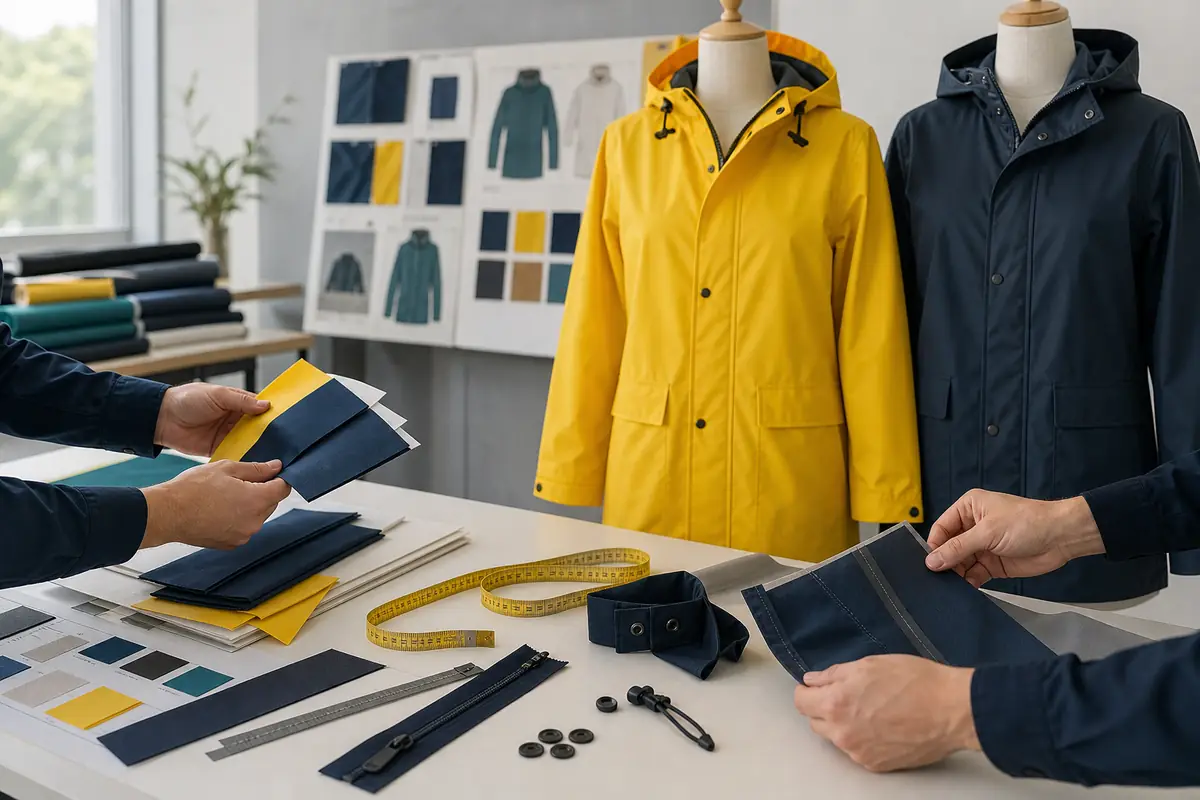
What this guide solves
This is not a universal specification. A children's retail coat, a road-crew suit and a lightweight branded jacket do not share the same risk. Treat every value on your project sheet as one of three things: a buyer target, a supplier proposal or a verified result. Confusing those states is how assumptions become claims.
Step 1 · Define the job
Diagnose the Wearer and Weather Before Naming the Material
A material choice is only defensible when the wearer, exposure and commercial channel are known. Start with the problem the garment must solve, then decide whether a PU route deserves evaluation.
Translate exposure into a product job
Write down rain intensity and duration as a use description first: intermittent commuting, prolonged outdoor standing, repeated kneeling in wet ground, spray while riding, or emergency issue at an event. Add wind, temperature and contact with dirty surfaces. The goal is not to invent a laboratory number; it is to give the technical team enough context to propose the right test and construction. If exposure includes chemicals, flame, electrical hazards or certified high visibility, treat those as separate protective requirements rather than assuming a raincoat automatically covers them.
Separate stationary, walking and high-movement use
A coat that works while a person stands at a gate may bind across the shoulders during cycling or expose the waist when a worker reaches overhead. Record posture, pace, equipment and expected layering. Note whether the user wears a helmet, gloves, backpack, harness or work boots. These relationships affect hood volume, sleeve articulation, jacket length, trouser rise, cuff closure and garment overlap. “Comfortable fit” is too vague; state which movements the approved sample must allow and where extra ease would create snagging or visibility problems.
Record reuse, care and storage conditions
One-time issue, seasonal retail use and daily workwear impose different folding, cleaning and retention needs. State whether garments return to a central store, remain in vehicles, travel in sealed kits or sit in a humid warehouse. Ask how the proposed coating, print, tape and trims should be cleaned and stored, then confirm that care labels match the approved route. A fresh sample cannot reveal every aging outcome, so any durability statement needs a defined method, condition and evidence source rather than optimistic language.
Define channel, destination and buyer-owned constraints
A school retailer, uniform distributor, promotional supplier and outdoor brand may evaluate the same yellow jacket differently. Record target market, age group, labeling language, packaging format, brand standard, delivery destination and documents your organization requires. Mark which constraints are mandatory and which are preferences. This prevents a supplier from spending time on a premium option when the project needs compact issue packs, or from quoting a minimal construction when the brand has fixed appearance and test gates.
Need broader category context before selecting a PU route? The Rainwear Pillar compares rainwear families without forcing one material into every use.
Review Rainwear Routes by UseStep 2 · Decode the material
Understand What PU Describes and What It Leaves Unspecified
Polyurethane can appear as a coating or part of a laminated structure. The letters “PU” do not tell the buyer the full textile identity, garment feel or finished performance.
Identify coating, lamination and textile support as different entities
Ask the supplier to name the construction from outside to inside. A coated fabric applies a polymer layer to a textile; a laminate bonds distinct layers. Both can involve polyurethane, but their behavior and manufacturing controls differ. Record the textile fiber, weave or knit, yarn or denier information when relevant, coating or film route, finished weight and which side faces the wearer. If the source can only say “PU fabric,” the quotation is not yet specific enough for a meaningful comparison.
Distinguish face, backing, lining and surface finish
The visible face affects color and printing, the support textile carries mechanical load, and a separate lining changes skin feel, bulk and movement. A surface finish may influence wet-out, soil release or appearance without being the primary waterproof barrier. Put each element in its own field. This avoids approving a smooth swatch while the production garment uses a different backing or assuming a lining is included because the sample photo appears opaque.
Treat hand feel and breathability as conditional outcomes
“Soft,” “quiet,” “breathable” and “lightweight” are judgments, not complete specifications. Define how the team will compare them: approved reference, finished garment weight, wearer trial, test method or an agreed descriptive scale. Moisture comfort also depends on activity, lining and ventilation; it cannot be inferred from PU alone. If the project requires a numerical moisture-vapor result, state the method and test configuration before treating values from different sources as comparable.
Keep PU, PVC and membrane choices tied to the job
PU can suit flexible, apparel-like programs, while other material routes may be more practical for rugged protection, transparent styles, disposable volume or advanced waterproof-breathable use. These are decision directions, not universal rankings. Compare total construction, wearer burden, surface behavior, seam compatibility, storage, compliance needs and commercial impact. If two material routes solve different jobs, do not force them into a price-only contest.
If a supplier proposal says only “PU,” ask EverBen to separate the missing material decisions before a sample is built.
Step 3 · Connect the product
Build a Finished-Garment Entity Map Before Requesting a Sample
A sample request becomes controllable when materials, panels, interfaces, trims, labels and packing are connected to one named SKU and revision.
Link material to panels, seams and openings
Identify where each material is used: shell body, hood, reinforcement, pocket bag, lining or reflective-detail base. Then connect panel edges to the selected seam route and note which seams cross high-flex or high-exposure zones. Add the front closure, pocket openings, vent points, hood adjustment, cuffs and hem. This relationship map exposes contradictions early, such as a seam tape that does not suit the coated side or a pocket layout that directs water toward an opening.
Map the PU Garment Route to Evidence
| Garment route | PU system record | Seam and opening risk | Fit, work or child input | Sample challenge | Evidence gate |
|---|---|---|---|---|---|
| Work jacket or coat | Declared substrate and PU construction | Hood, front, shoulder, pocket and cuff paths | Work motion, layers, tools and wearer range | Complete garment movement and spray observation | Project-specific sample and construction file |
| Poncho or cape | Film/coated textile identity tied to the SKU | Hood, neck, side openness and hem | Coverage, carrying and don/remove route | Representative wearer and exposure sequence | Recorded conditions without universal claims |
| Child garment | Exact material and component declarations | Openings, attachments, closures and loose parts | Intended age/size route and destination review | Complete garment fit, movement and component inspection | Buyer-controlled safety and labeling review |
Connect style routes to wearer and channel
An adult jacket, women's long coat, child's overall, bib trouser and work suit can belong to one commercial program, but they should not share an unnamed specification. Give every style a stable SKU identity, target wearer, size logic and use channel. Record which decisions are program-wide—brand colors or carton marks—and which stay product-specific—hood safety, garment overlap or reinforcement. This allows one coordinated range without erasing the different risk of each item.
Add color, artwork, trims, labels and packing entities
Color is not just a Pantone number; coated-surface appearance, lighting, lot variation and adjacent trim can change the result. Artwork needs file version, size, location, method and a compatible surface. Snaps, zippers, cords, adjusters, labels, polybags and cartons each need an approved reference or defined option. When these entities are added late, the sample may no longer represent the price, test scope or packing density used in the first quotation.
Assign an owner and approval record to every critical decision
For every open field, record who supplies the input, who approves it and what evidence closes it. The buyer may own the artwork and legal claim; the manufacturer may propose materials and construction; an approved laboratory may generate a required test result. Use dates and revision numbers, not memory. A decision without an owner stays open even when a sample looks acceptable, and an unrecorded approval cannot protect the next production lot.
The corresponding Product Landing Page turns this entity map into a manufacturer-ready program with EAV fields, SKU controls and quotation inputs.
Build the PU Rainwear Product BriefStep 4 · Control claims
Separate Buyer Targets, Supplier Statements and Verifiable Evidence
A target belongs in the brief; a verified result belongs in the approval record. Keep those states visible so an aspiration does not become an unsupported product claim.
Define a target without pretending it is achieved
A buyer can request a water-resistance level, restricted-substance condition, reflective layout or age-market requirement, but the request is not proof. Mark it as “target—pending supplier confirmation” until the construction, method and responsible evidence are agreed. If the team does not know a numerical value, describe the exposure and business consequence. A responsible supplier can then recommend a test route instead of accepting a random number that may be irrelevant.
Match evidence to material, component or finished SKU
A company certificate describes a management or audit scope. A fabric report addresses a tested specimen. A tape document addresses a component. A finished-garment result addresses the tested design and sample. These records answer different questions. Build an evidence register with object, claim, method, issuing body, date, report number, tested sample identity and applicable SKU. Never use a component file as automatic proof for the complete garment.
Check scope, method, date and sample identity
Before accepting a report, compare the named material or product with the approved bill of materials. Confirm whether the method and threshold match the target market and customer requirement, whether the report remains current for the decision, and whether design changes affect relevance. A valid-looking PDF can still be unrelated to the color, backing, tape layout, size or supplier lot that will ship.
Mark unverified claims as open decisions
Use a visible status such as proposed, submitted, accepted, rejected, waived or not applicable. Avoid vague labels such as “should pass” or “standard quality.” If marketing wants the words waterproof, breathable, reflective, chemical-resistant or sustainable, ask what measurable and documentary basis will support them. The release gate should block the claim—or the shipment—when required evidence is missing.
Send the claim, market and current document status—not just a certificate name—and request an evidence-scope review.
Step 5 · Challenge leak paths
Audit the Garment Interfaces Where Water and Complaints Enter
A coated panel may resist water while the finished rainwear fails at needle holes, zipper ends, pocket entries, hood edges or garment overlap. Inspect interfaces as a connected system.
Review seams and seam-treatment compatibility
Map every seam by location, stress and exposure. Record whether it is stitched, welded, taped or otherwise sealed, and confirm the treatment suits the actual coated surface. Ask how settings are controlled and how adhesion or seal integrity is checked after cooling, flexing or folding. High-load shoulder, crotch and pocket-corner zones may need both mechanical strength and water control; one cannot be assumed from the other.
Challenge front closures, pocket entries and zipper ends
Trace the path of wind-driven rain across the front. Review flap width and direction, snap or zipper spacing, zipper garage, top stop, chin/neck transition and any opening behind the flap. For pockets, examine entry angle, cover, bag placement and drainage. A premium-looking zipper does not guarantee water control, and a storm flap can still channel water inward if its geometry or fastening allows gaps.
Inspect hood, neck, cuff, hem and overlap geometry
Ask the sample wearer to turn the head, raise the arms, bend, squat and reach while wearing the expected underlayers or equipment. Check hood field of view, face opening, back adjustment, collar transition, cuff closure, hem movement and jacket-to-trouser overlap. A static mannequin review cannot show whether the protective geometry opens during motion. Record the movement and result so corrections are reproducible.
Include flex, abrasion, folding and storage stress
Water-entry control can change after the garment is packed, transported or repeatedly bent. Identify fold lines, tape edges, printed zones, high-rub areas and hardware contact points. Use a project-appropriate challenge sequence, then inspect appearance and function. Do not publish a lifetime promise from a single fresh sample; define what was challenged and which failure signs—peeling, cracking, delamination, opening or transfer—are unacceptable.
Turn the garment drawing into an interface checklist before the first sample hides a weak opening behind good-looking fabric.
Step 6 · Make fit measurable
Convert Fit and Movement Into an Approval Method
Fit approval should connect a named sample, base size, wearing layer and movement task to measurements the production team can repeat.
Choose the base size and wearing layer
Select a base size that represents the target wearer and note what sits underneath: ordinary clothing, insulated workwear, uniform or protective equipment. Approving the same garment over a T-shirt and a thick midlayer can produce opposite conclusions. Record body or fit-model reference where appropriate, garment measurements and the intended ease. Avoid copying another market's size label without reconciling actual dimensions and grading.
Measure movement-critical points rather than relying on labels
Chest and length are not enough. Depending on the style, review shoulder or raglan geometry, sleeve reach, armhole, hood opening, cuff, hem sweep, jacket back length, trouser rise, thigh, knee, inseam and garment overlap. Define the measurement method and tolerance only when the buyer and manufacturer have evidence to support it. A label such as XL cannot control production unless it points to an approved chart.
Control grading, size ratios and style-specific balance
Check how key dimensions change across the size scale and whether the hood, pockets, artwork, reflective details and trim lengths remain functional. Women's, children's, bib and long-coat routes may need different balance and grading logic. Review at least the risk sizes appropriate to the program rather than assuming a base-size correction automatically works at both ends. Then connect the final size ratio to destination demand and carton allocation.
Record fit comments so bulk teams can act on them
Write each comment as location, issue, required change and verification method. “Sleeve too tight” becomes “increase the measured point at the specified location, preserve cuff opening, and repeat the reach test over the approved layer.” Attach a dated image or drawing when helpful, but keep the written decision authoritative. Close comments individually and state whether a revised sample, measurement check or written confirmation is required.
If size labels and movement comments are not tied to one measurement method, request a fit-risk review before approving the range.
Step 7 · Normalize the offer
Compare Quotations and Samples on One Decision Ledger
Two prices become comparable only after both suppliers answer the same product, evidence, packing and responsibility questions.
Normalize material and construction before price
Place each proposal in the same table: textile support, PU route, finished weight or other agreed identity fields, lining, seam treatment, closure system, hood/cuff design, trims and reinforcement. Mark supplier alternatives explicitly. If one quote assumes a stock fabric and another includes a custom color with different testing, they are not the same offer. Compare product identity first, then cost.
Separate included, excluded and undecided work
List sample rounds, pattern development, color matching, artwork setup, components, testing, inspection, labels, packaging, inland transport and document preparation. Use included, excluded, optional or pending instead of leaving blank cells. Blank does not mean free. This step reveals whether the apparent price gap comes from product efficiency or from work that will appear later as a charge, delay or buyer task.
Track sample comments with revision ownership
Keep one comment ledger for all parties. Give every issue an identifier, date, sample revision, owner, requested action, supplier response, evidence and closure status. Do not combine ten changes in one paragraph. When a material or design change affects price, timing, testing or packing, link the commercial update to the same identifier. That connection prevents the final purchase order from reverting to an earlier assumption.
Recalculate commercial impact after each change
A new color, lining, zipper, print method, size split or test can change material minimums, setup, yield, packing and production sequence. Ask for the impact before approving the change, then update the comparable baseline. The goal is not to prevent development; it is to make the business consequence visible while there is still a choice. Freeze the final offer only when the decision ledger and sample revision agree.
Use the PU Rainwear Product Page when your decision ledger is ready to become a controlled manufacturer RFQ.
Request a Normalized PU Rainwear QuoteStep 8 · Release with records
Release Bulk Only When Product, Pack and Evidence Agree
The approved sample is one control object. Bulk release also needs a current bill of materials, measurement and workmanship checks, evidence status, labels, size-color allocation and packing records.
Freeze the golden reference and bill of materials
Seal or otherwise identify the final approval reference and record its date, revision and authorized exceptions. Pair it with the approved material, component, artwork, label and packing files. If a physical reference cannot be retained at every location, define controlled photos, measurements, swatches and digital records that point back to the master. Production teams should never choose between conflicting samples without a written hierarchy.
Define incoming, in-process and final checks
Incoming checks confirm material and component identity before they are consumed. In-process checks catch seam, measurement, artwork and assembly drift while correction is still possible. Final checks reconcile workmanship, function, labels, assortment and packing against the current release file. Choose inspection level, test method and escalation rules according to project risk; do not borrow a universal number from a marketing page.
Reconcile labels, size-color ratios and carton allocation
Count accuracy is not enough when products travel to several markets or customer locations. Match the SKU, size label, color, barcode or customer code, polybag mark, carton quantity and destination allocation. Verify that garment folding protects coated surfaces and decoration, and that carton dimensions and weight remain practical. A correct garment in the wrong assortment still creates stock, event or replenishment failure.
Preserve retained samples and change history for reorders
Keep an agreed retained reference, key swatches, artwork files, approved measurements, packing standard, inspection summary and change log. On reorder, review material availability and any process, regulatory or customer changes instead of assuming the old specification remains possible. If a component is substituted, reopen the decisions and evidence it affects. Repeatability comes from traceable approval, not from a filename that says “same as last time.”
The evidence ladder for a PU rainwear program
Use the least ambiguous evidence that answers the actual decision. Company-level credentials help qualify a supplier; approved material files identify inputs; component records support trim-specific questions; the golden reference confirms design intent; in-process and final records show what the production lot was checked against.
Company credentials, material files, component records and finished-garment results answer different questions.
Do not collapse the ladder into a certificate folder. Build an index that names the claim, object, SKU, method, revision, owner and release status. This makes missing evidence visible before shipment and gives future reorder teams a usable starting point.
Define the bulk gates now if a passed sample still leaves labels, evidence, allocation or retained references open.
Step 9 · Buyer questions
PU Rainwear Buying Guide FAQ
Use these answers to prepare an internal brief. The final material, construction, tests, MOQ and delivery plan still require project-specific review.
What is the first question a buyer should ask when sourcing PU rainwear?
Ask what job the garment must perform for a defined wearer, climate, activity level, reuse cycle and sales or issue channel. Material selection becomes meaningful only after those conditions are clear.
Does a fabric waterproof report prove the whole PU raincoat?
No. A fabric report addresses the tested material and method. Finished performance can also depend on seams, closures, pockets, hood geometry, cuffs, hems, printing, damage and workmanship. Evidence must match the claim and the finished SKU.
How many PU rainwear samples are needed before bulk production?
There is no universal number. The sample path depends on design maturity, material availability, fit risk, artwork, trim development, test needs and how many SKUs differ. Define the purpose and pass criteria of each sample instead of approving by count.
What should a buyer compare when PU rainwear prices differ?
Normalize the material identity, finished construction, size and color split, trims, artwork, tests, inspection, packing, commercial exclusions and revision status. A lower price is not comparable when it omits a different task or assumes a different product.
Which details should be sent to a PU rainwear manufacturer?
Send the wearer and use case, product route, material target, construction and interface requirements, size range, color and artwork, packing, estimated quantity, destination, required window, evidence needs and unresolved decisions.
If your internal team still has open decisions, send them as questions. EverBen will not turn an unknown target into an unsupported promise.
Editorial boundary: this guide explains a procurement method. Product values, compliance scope, MOQ, timing and evidence are confirmed only for the current project and finished SKU.